In this tutorial I'm going to teach you how to create your very own iOS theme!
Before we get started you will need the following prerequisites:


This guide was written by PINPAL. If you have any questions, feel free to send me a message:
Discord
PINPAL#2591
Twitter
@TPINPAL
Reddit
THE_PINPAL614
Github
PINPAL
Anyway, that's enough introduction, let's dive right into this!
Without following the correct structure your theme won't work or may not even show up!
So that's what I'm here to help you with.
First you will need to create a folder and name it ThemeName.theme.
It's essential to add .theme to the end or else it won't work!
Inside this folder you will need another folder called IconBundles like this:
Now for the hard part, you'll need to create a file named Info.plist
Place it in the root directory of the theme like this:
Now open up your Info.plist with your favourite text editor.
I highly recommend Atom Editor by Github or Microsoft VS Code however most text editors will work. You can even use XCode!
Your going to need to change the ThemeName to the name of your theme.
<?xml version="1.0" encoding="UTF-8"?>
<!DOCTYPE plist PUBLIC "-//Apple//DTD PLIST 1.0//EN" "http://www.apple.com/DTDs/PropertyList-1.0.dtd">
  <plist version="1.0">
  <dict>
    <key>PackageName</key>
    <string>ThemeName</string>
    <key>ThemeType</key>
    <string>Icons</string>
  </dict>
</plist>
Info.plist
Download Example File

In the future you can add more complex stuff to your Info.plist but for now this is enough.
You can extra things such as changing the font on the calendar icon, dock color, icon badges etc.
Now let's get the most important part out the way. You are going to need some software to create your icons with! Personally I use a combination of Adobe Illustrator and Adobe Photoshop. A lot of other designers I know also recommend Sketch.
Don't worry, all hope is not lost! Theres still some great software out there! You can try programs such as Paint.net (Windows only) or Gimp. Free programs may not have all the features but that doesn't make them bad!
It is highly recommended to create your icons at a resolution of 512x512.
This allows your icons to work on iPad and also on future devices with higher resolution displays!
Also thanks to IconBundles you no-longer have to worry about making loads of different size icons for each device unlike what you used to have to do when using Winterboard! Awesome!
If you plan on making your icons a custom shape, for example circular. I highly recommend that you create the icons themselves square and add an icon mask. Just create a square icon like this:
Then later in this guide I will teach you how to apply a mask to all your icons. The main benefit to this method is that the mask can be enabled/disabled by the user in their themeing engine!
Naming the icons files correctly is extremely important! All icons must be saved in .png format.
Icons must be named: bundleID-large.png into the IconBundles folder like this:
You can save as many icons as you would like into your IconBundles folder
A bundleID is a unique identifer for each application. For example the App Store app is com.apple.AppStore
This would mean your completed icon would be saved as com.apple.AppStore-large.png
I wrote a page here where you find out the BundleID's for the stock apps aswell as popular Jailbreak apps:
As for finding those for third party/app store apps you can use this site:
An icon mask is a optional theming feature that allows a mask to be applied to icons. A mask allows you to create your icons themselves in a square then you could, for example, make them all circle. The main advantage to using icon masks is that the user can toggle them on or off or use any mask shape they want.
If you would like to have all different shape icons, that's also possible. Just save the icon with a transparent background directly to IconBundles.
Icon masks are optional and if the Info.plist is left like the one above at the very start of the guide then your theme will NOT use a mask. If you would like to enable the default iOS stock icon mask (the classic rounded rectangle) then simply add the orange section to your Info.plist:
<?xml version="1.0" encoding="UTF-8"?>
<!DOCTYPE plist PUBLIC "-//Apple//DTD PLIST 1.0//EN" "http://www.apple.com/DTDs/PropertyList-1.0.dtd">
<plist version="1.0">
  <dict>
       <key>IB-MaskIcons</key>
    <true/>
    <key>PackageName</key>
    <string>ThemeName</string>
    <key>ThemeType</key>
    <string>Icons</string>
    </dict>
  </plist>
Info.plist
Download Example File
And that's all you need to do to enable Icon Masks. If you would like to use a custom icon mask shape then continue reading below.
it should be noted that you don't have to use custom icon masks. This is an optional addition to your theme.
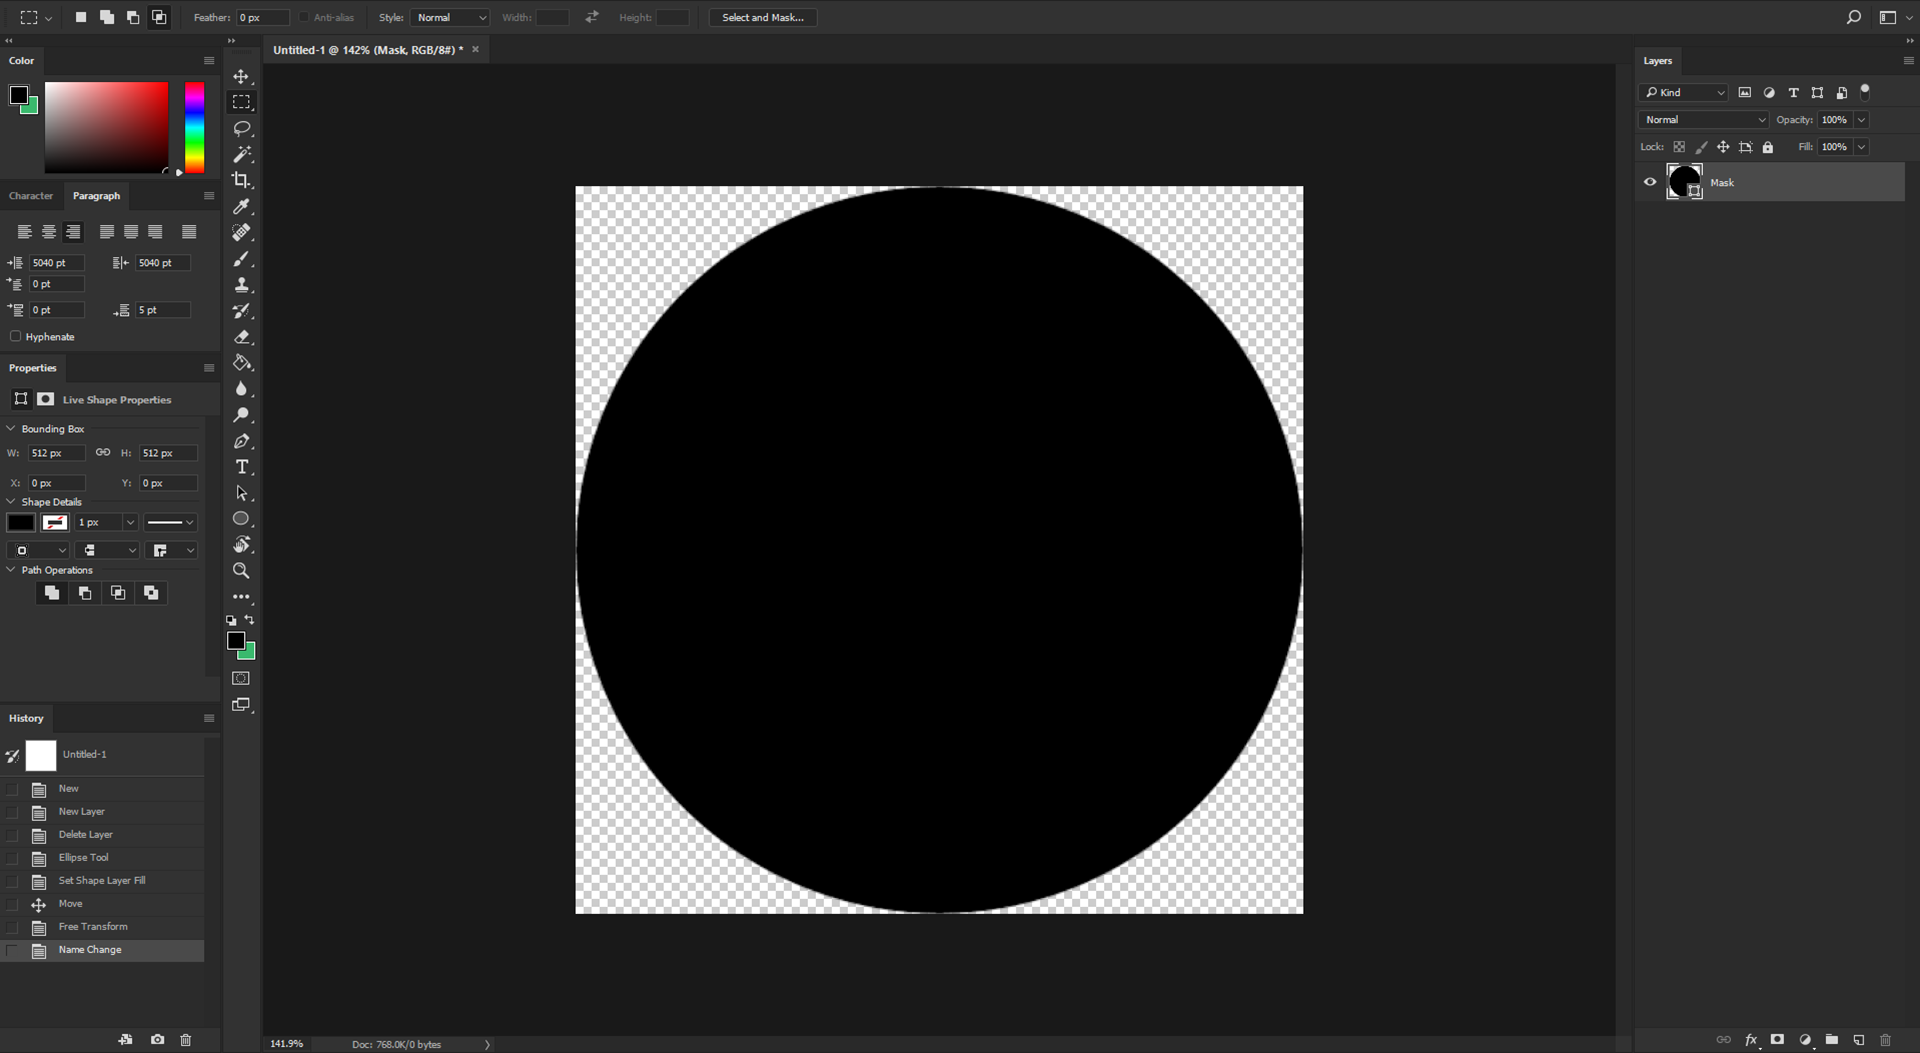
Before we save our custom icon masks, we are first going to need to create some. Your going to need to start by opening a transparent 512x512 document in your image editor of choice. It is very important your background is transparent. Now you will need to create the shape of the mask, this can be any shape you like.
Areas you want the mask to hide should be transparent and areas you want to keep should be pure black (#000000).
For example see the following circle mask below:
In this section I am going to explain how you can save your icon masks. First we are going to need to create some new folders. In the root directory of your theme, create a folder named Bundles so that you have two folders like this:
Inside the Bundles folder you are going to need to add another folder named com.apple.mobileicons.framework just like this:
Within this directory we can place all of our masks. I'm going to warn you now though, masking doesn't support IconBundles so unlike making icons we have to use the old fashion way of making the icons at all the different resolutions for different devices and areas of iOS - this means we end up with a lot of files.
Below you can find a table of all the different filenames and resolutions you will need to save your mask in:
| Filename | Resolution |
|---|---|
| AppIconMask@2x~ipad.png | 152x512 |
| AppIconMask@2x~iphone.png | 120x120 |
| AppIconMask@3x~ipad.png | 180x180 |
| AppIconMask@3x~iphone.png | 180x180 |
| AppIconMask~ipad.png | 76x76 |
| DocumentBadgeMask-20@2x.png | 40x40 |
| DocumentBadgeMask-145@2x.png | 145x145 |
| GameAppIconMask@2x.png | 84x84 |
| NotificationAppIconMask@2x.png | 40x40 |
| NotificationAppIconMask@3x.png | 60x60 |
| SpotlightAppIconMask@2x.png | 80x80 |
| SpotlightAppIconMask@3x.png | 120x120 |
| TableIconMask@2x.png | 58x58 |
| TableIconOutline@2x.png | 58x58 |
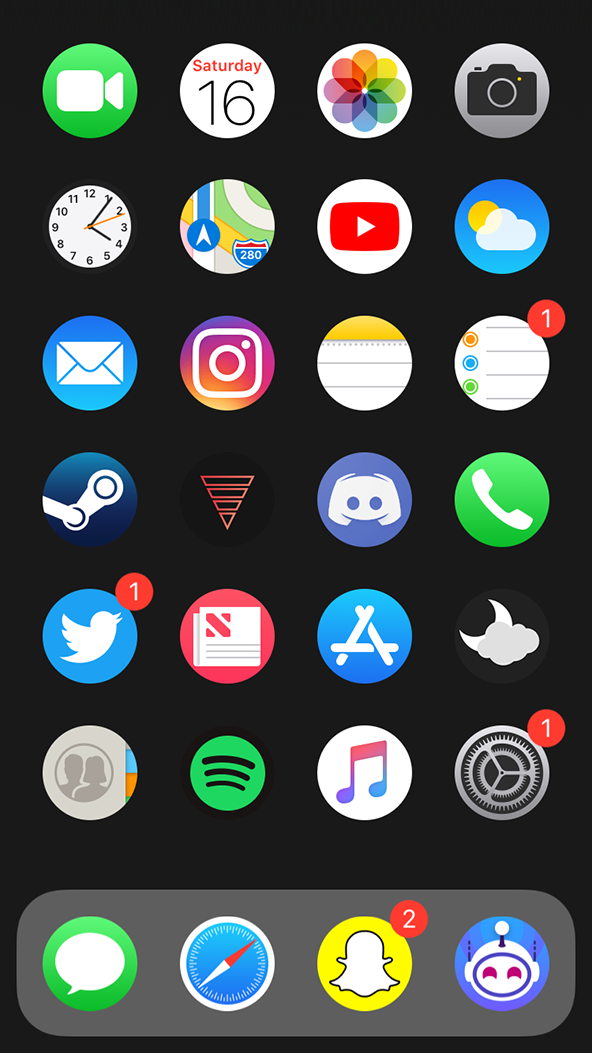
This means you end up with a folder looking something like this (but with more icons in it):
But that's it, you have now created and setup custom icon masks!
If you are looking to make a truly complete theme then you should definetly consider theming the icons inside the Settings app.
Depending on your themes targeted iOS versions, the name of the com.apple.preferences-framework folder can change.
You can include multiple folders if you wish to support multiple iOS versions.
The folder names for the versions are as follows:
For iOS 10 and Older
com.apple.preferences
For iOS 11
com.apple.preferences-ui-framework
For iOS 12 and Newer
com.apple.preferences-framework
I wrote a page here where you find out the filename for each cell in the settings menu. Just head over to the "Settings" tab of the site linked below:
Here we are going to need to compile our theme into a .deb format ready for Cydia/Sileo.
Start by Creating a new folder. This one can be called anything as long as there are no spaces or any special characters.
For this example I will name mine ThemeNameForCydia.
Now we are going to add a new folder inside. This one must be named DEBIAN just like this:
Now we are going to create the control file. This is very important for telling Cydia/Sileo all the information about your theme. This includes the name and description. Create a new file inside the DEBIAN folder. This file must have no filename extension and be named control It should now all look like this:
Now your going to need to open up your control file with your favourite text editor just like you did with the Info.plist.
Using a text-editor that supports UNIX line endings is extremely important at this step! The ones I recommended earlier for Info.plist should work if you are unsure.
Inside the control you will need to add the following code and fill out all the orange text.
Package: com.yourname.themename
Name: Theme Name
Version: 1.0
Architecture: iphoneos-arm
Description: A theme with beautiful icons!
Author: Your Name
Maintainer: Your Name
Section: Themes
Depends: com.anemonetheming.anemone | com.spark.snowboard
control
Download Example File
• The package field MUST be lower case!
• The version field MUST be changed everytime you update your theme!
• The control file MUST have an extra blank line at the bottom!
Your now going to need to create a new folder inside ThemeNameForCydia. You will name this folder Library
Finally we are going to add our ThemeName.theme folder from earlier.
Just drop in ThemeName.theme into the new Themes folder. Like this:
Now we need to turn this folder into a .deb package!
This is a super easy process! First you are going to need to SSH into your iOS Device.
Now navigate to /var/mobile/Documents
Drag and drop your ThemeNameForCydia folder onto your device in this location. Just Like this:
Now we just need to run one command and then our theme is all ready to go!
Connect to your iOS device using SSH and open the SSH terminal.
Run the following command:
dpkg -b /var/mobile/Documents/ThemeNameForCydia
Once the command is completed you will see a new file: ThemeNameForCydia.deb
That's it you are all done! Feel free to move the .deb to your computer and delete it and the ThemeNameForCydia folder from your iOS device!
If you made it all the way through the guide and finished your theme I want to congratulate you! You made it!
If you would like to know more about the advanced features of theming such as theming the clock/badges/dock etc you can read the official Anemone Wiki available here (most of which also work in Snowboard):
Anemone Wiki
This guide took many hours to write and I continue to update it along with collecting the latest stock Bundle ID's.
As I said at the start of the guide you can always contact me on Discord or Twitter if you have any questions!
If you really enjoyed this guide and would like to buy me a drink you can use the link below: